
Like other projects, Onsplash is an attempt at improving my skills in developing frontend applications. Onsplash is my first larger project and it implements several common core functionalities that many web applications have, i.e. user authentication and CRUD operations. More specifically, after a user signs up, they are able to "upload" an image which will be displayed publicly. Users will then be able to like that image and view it on the owner's page. All users are able to view, download and search for images.
I was not going for originality when naming this project Onsplash. Onsplash is, as the name maybe implies, a clone or recreation of Unsplash. And if it wasn't immediately obvious, this is not an attempt at creating a competing product to Unsplash. I am crossing my fingers that I won't get sued, but I'll take my chances!
This was also my first project using Typescript in React and GraphQL for querying and mutating data, and the point of using these was to get a better grasp of them.
Another motivation for creating this project was to try to build and manage a fullstack application. I did, however, use a "backend-as-a-service" (Nhost and subsequently Hasura) so I could focus on implementing the client-facing side of the app.
Lastly, the challenge of creating the actual UI with CSS was another motivation. Especially the thought of recreating the iconic gallery design seen on Unsplash was something that really sparked my interest.
In summary, the main motivations for creating the project were:
- Learning Typescript
- Learning GraphQL
- Creating common web-app functionality, such as user authentication and search
- Managing a fullstack application
- Organizing a larger project
- Recreating the UI with CSS
Organizing the project
Organizing how to execute a project is one of the most important aspects of creating any larger project. One integral management tool I used to organize the project was a kanban board. The kanban board I used (and continue to use for most of my projects) is a simple 3-column board with the columns "to-do", "in progress" and "completed", and in this way I was able to keep track of what I was working on and what I had completed.
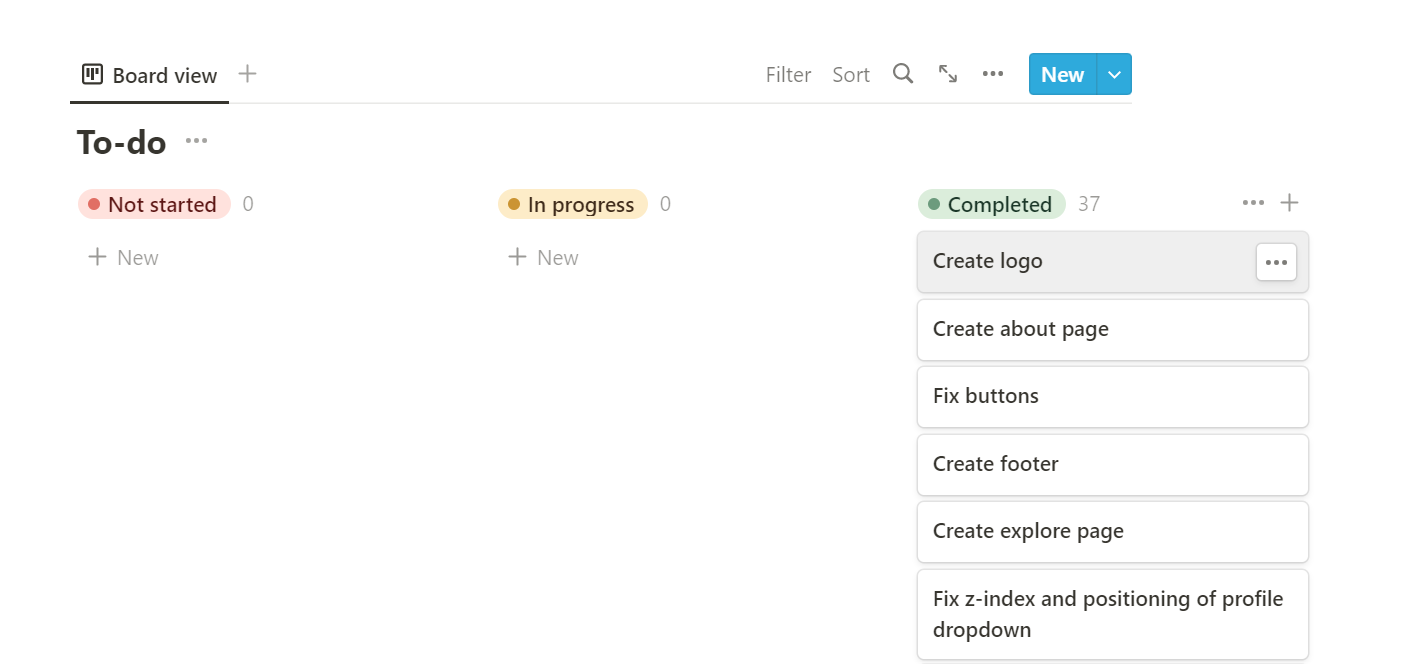
The nature of kanban board allows for multiple people to collaborate, hence the popularity of these boards within agile project management. However, it's also beneficial for a single developer to organize what needs to be done and when.
On a different note, frontends will typically need to be designed before being built, but in the case of Onsplash there was no need for that. I was able to refer to the Unsplash website since I was literally recreating it. My intention was not to recreate Unsplash pixel-perfectly, so I still had to make smaller design decisions but overall I saved a lot of time not having to do designing.
I began the project by mapping out all the pages needed in Onsplash. I then implemented the core functionality in each page, starting with the signup page.
Main challenges
Persisting data
Implementing the main features posed the biggest challenges in building Onsplash. One of these challenges was to persist data. I used Hasura to create an instant GraphQL API which was connected to a PostgreSQL database to query and mutate data. Alternatively, I could have created the backend manually but since this is primarily a frontend project, I chose the easy way.
I also had to decide whether to allow users to upload images themselves like you do on Unsplash and thereby possible pay hosting fees, or have users reference a URL to an externally hosted image and store that URL on the database. I chose the latter where users reference an external image, preferably through Unsplash. Fortunately, Unsplash has an endpoint where you can get random images uploaded to Unsplash, so if you try to upload an image, you will see a link to randomly generate an image from Unsplash which you can then reference when filling in the form to submit an image.
Creating the image gallery
Another challenge was creating the image gallery like the one on Unsplash:
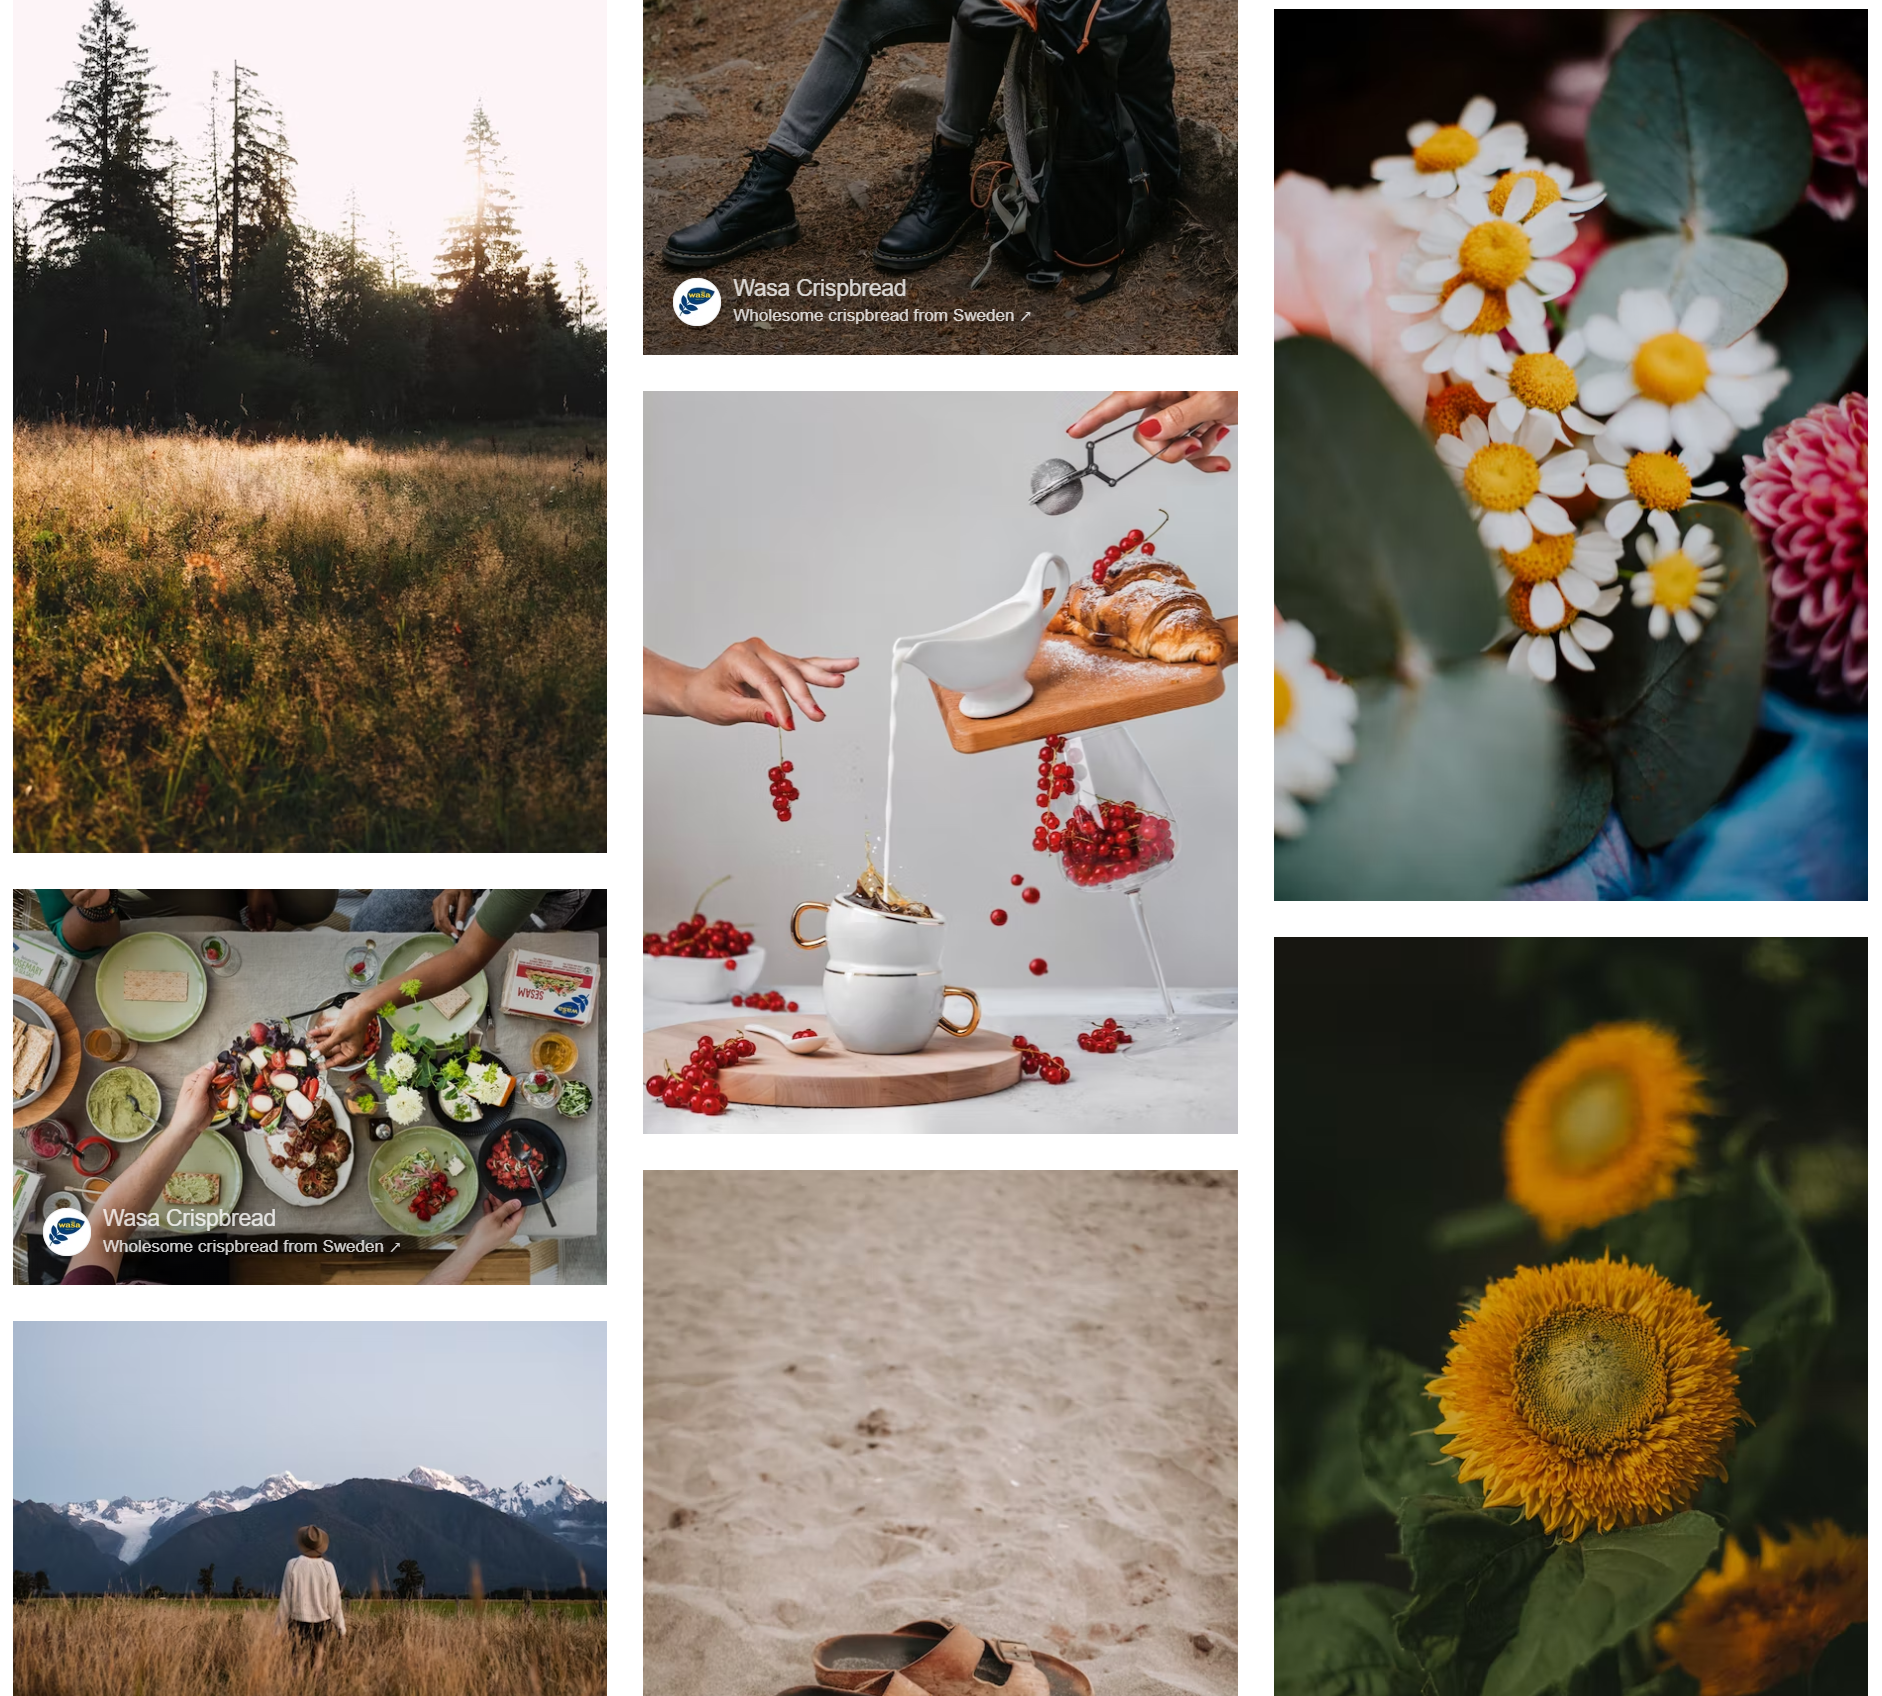
I tried to recreate the Unsplash image gallery as accurately as possible. The gallery has several features that I needed to recreate:
- It had to maintain the aspect ratio of the image and the image had to be fully visible.
- There had to be a gap between images.
- The images had to be randomly placed so it wouldn't look like a fixed grid.
In order to do this, I used the same approach as Unsplash. I created a three-column grid which would each have a child element that would hold the images that needed to be presented. Those child elements would simply be another grid with, although it may aswell have been a flexbox. I used TailwindCSS for the styling, so the code for it looks a little like this:
<div className="grid grid-cols-3 grid-rows-1 gap-5">
  <div className="grid grid-cols-1 h-fit gap-5">
    <img src="/images/image1" />
  </div>
  <div className="grid grid-cols-1 h-fit gap-5">
    <img src="/images/image2" />
  </div>
  <div className="grid grid-cols-1 h-fit gap-5">
    <img src="/images/image3" />
  </div>
</div>
The grid layout was not the only challenge in implementing the gallery. Since the images that needed to be presented were returned from the API as an array of objects, I couldn't simply map over the array to display them on the screen. So I decided to split the array into three nested arrays, which I could then map over. This is the simplified JSX for the Gallery component:
import { splitArrayToThreeNestedArrays } from 'common/utils/helpers'

const Gallery = ({ posts }) => {
  const threeArrayPosts = splitArrayToThreeNestedArrays(posts)

  return (
    <div className="grid grid-cols-3 grid-rows-1 gap-5">
      {threeArrayPosts.map((splitPosts, i) => (
        <div key={i} className="grid grid-cols-1 h-fit gap-5">
          {splitPosts.map((post) => (
            <image
              key={post.id}
              src={post.url}
            />
          )
      )}))}
    </div>
  )
}
The splitArrayToThreeNestedArrays function split the array into three equally sized nested arrays each containing image objects. This approach presented another problem, however. At the end of the gallery, when there were no more images to display, the columns of images did not end at roughly same place. Instead, some columns of images were longer than others, like this:
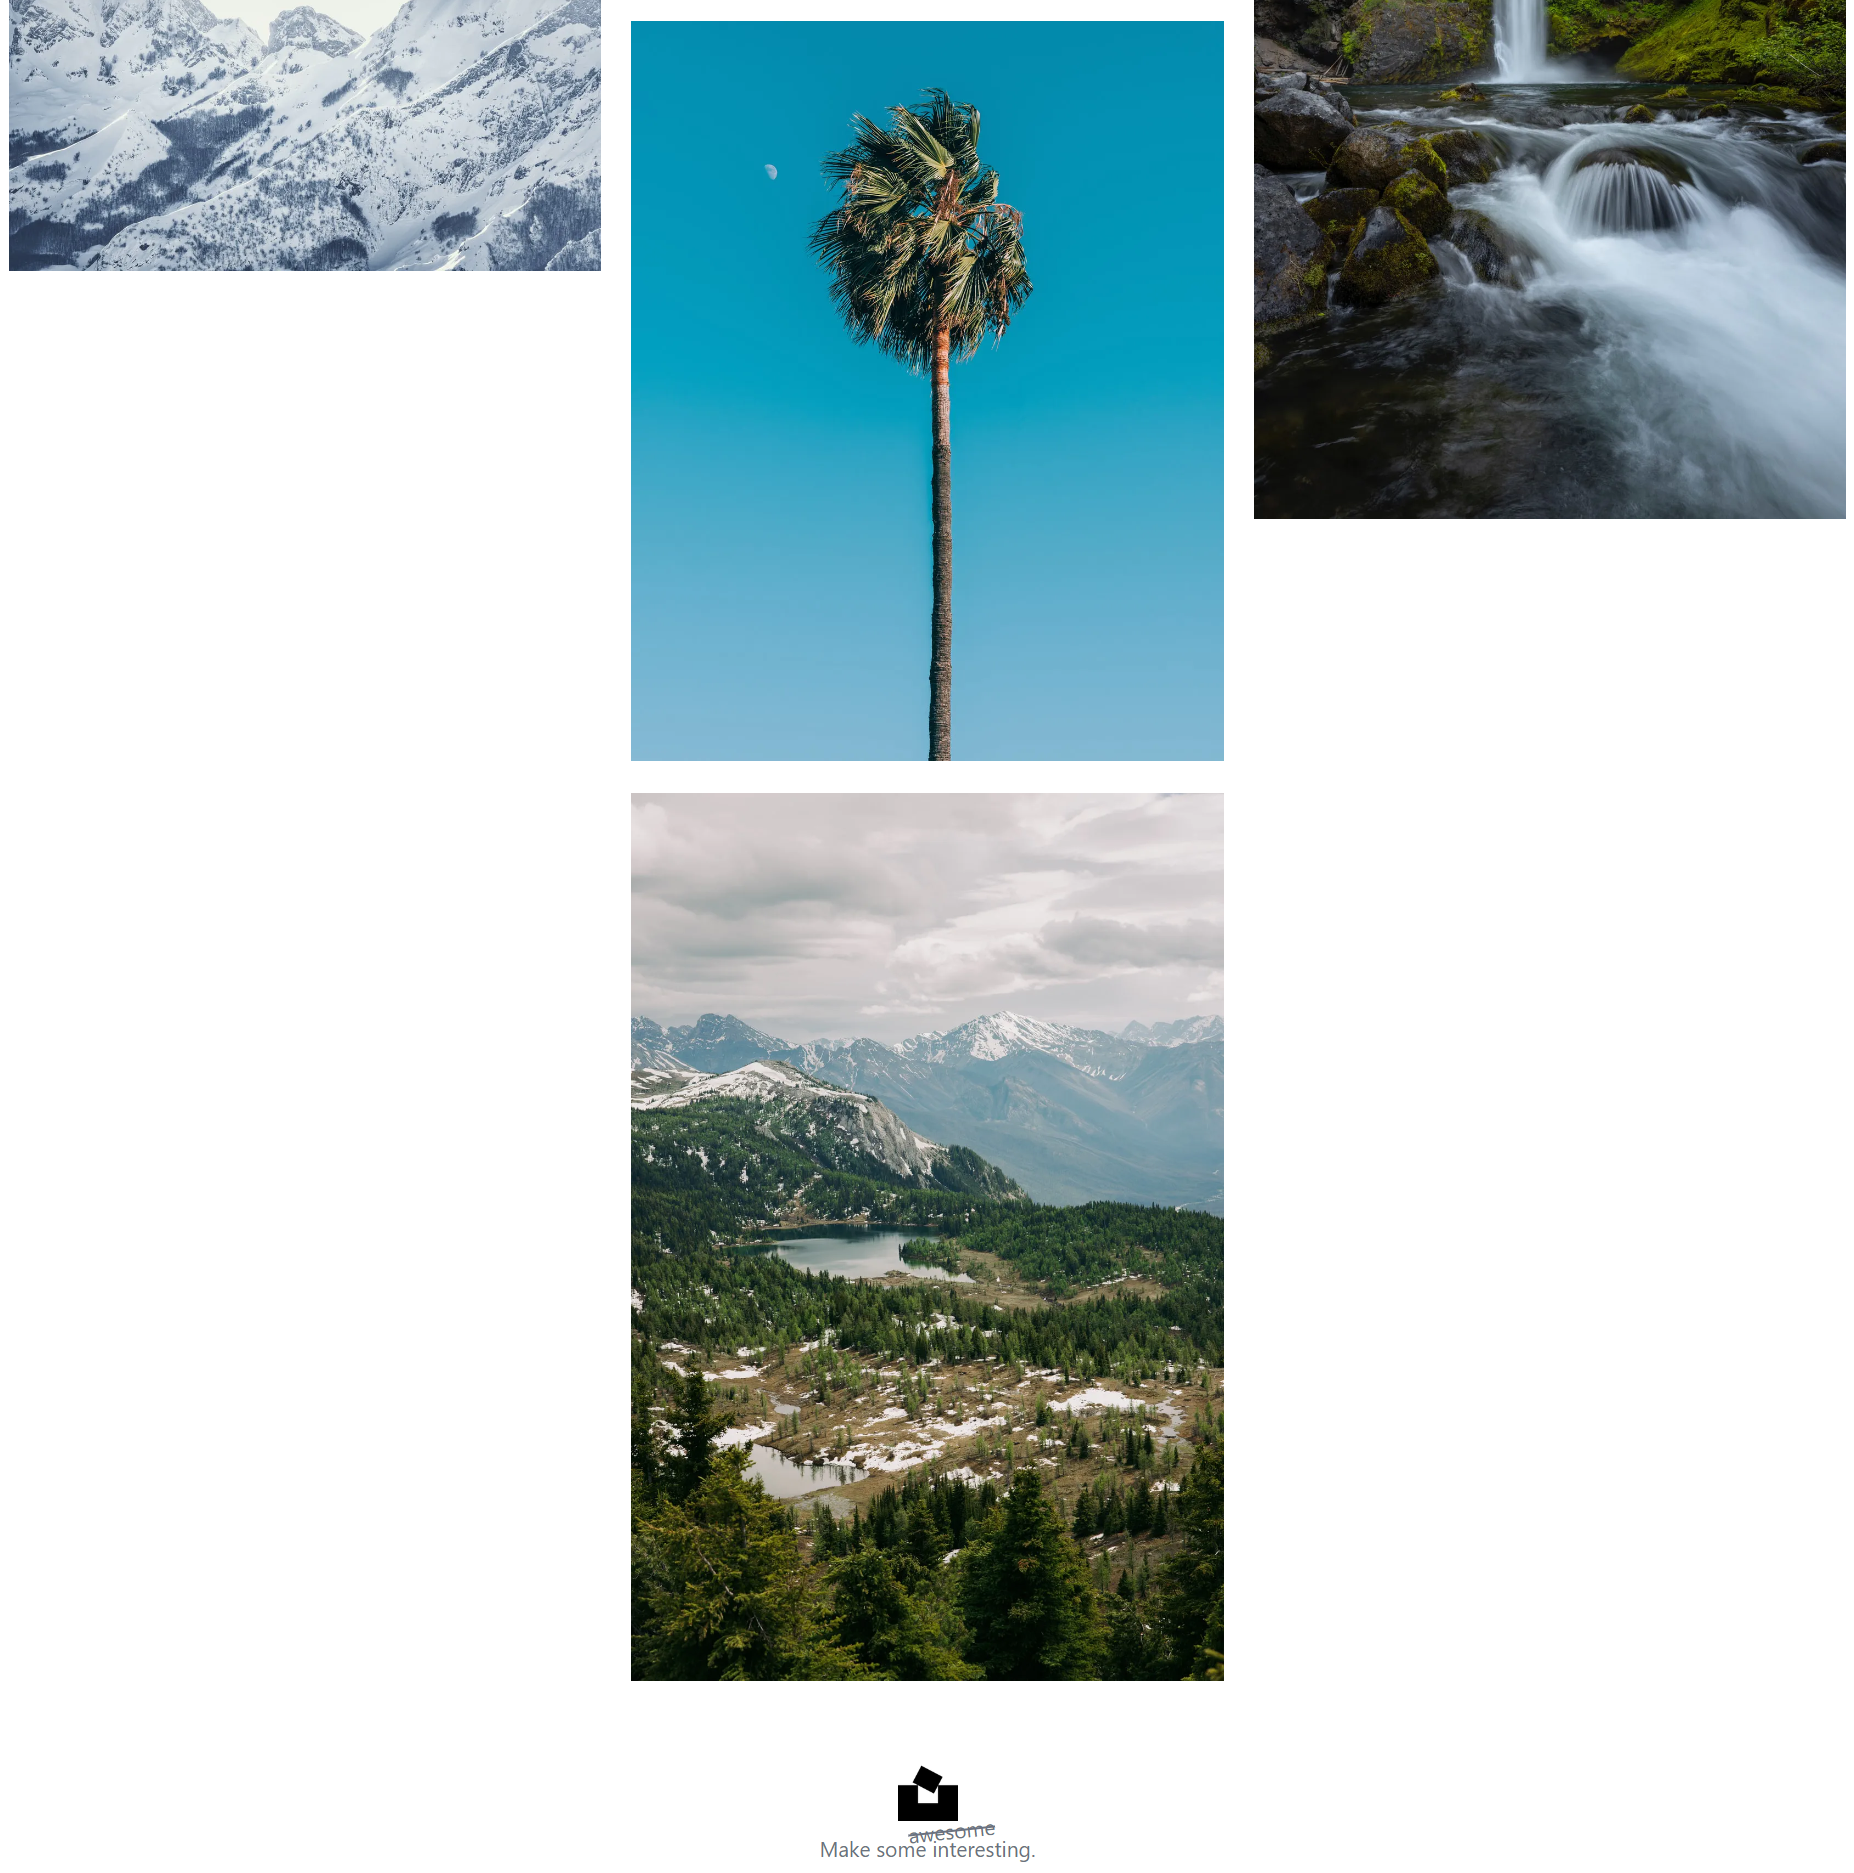
The reason for this visual glitch was that, despite each array being equally sized, the height of the images in the nested arrays were all random which resulted in each column having a somewhat random height. To fix this, I added a height property to the image object and split the arrays depending on the height of each image. This is the code for the splitArrayToThreeNestedArrays function, modified to account for the change. I will explain it in more detail.
const splitArrayToThreeNestedArrays = (arr) => {
  // initiate nested arrays corresponding to each column
  const result = [[], [], []]
  // initiate array of heights for each column
  const heights = [0, 0, 0]

  arr.forEach((_, i) => {
    // find the column with the lowest height
    const lowestNestedArrayIndex = heights.indexOf(Math.min(...heights))

    // add the post to the column with the lowest height
    result[lowestNestedArrayIndex].push(arr[i])

    // update the height of the column with the lowest height
    heights[lowestNestedArrayIndex] =
      heights[lowestNestedArrayIndex] + arr[i].image.height
  })

  return result
}
The function initiates two arrays - one is an array of three nested arrays for the result, and the other is an array of heights representing the height of each column. The function then loops over the array of posts (the array has to be an array of posts) and initially finds the shortest column, which is the index of the smallest integer within the heights array. This index is then stored as lowestNestedArrayIndex. The image object in the current iteration is then appended to the nested array within the result array. Lastly, the height of the column is updated to account for how much height the new image adds to the column. This column is heights[lowestNestedArrayIndex]. On the next iteration, a new column will then be the shortest and another image is appended to that column. This results in each column having roughly the same height:

You definitely could modify the function to make sure the columns have the smallest possible difference in height, but I decided it wasn't worth it.
Note: I omitted Typescript and parts of the Javascript to make the examples simpler (:
Folder structure
The website required a lot of different logic. Having a solid folder structure was key to keeping things manageable.
I adopted a folder structure inspired by a blog post by a user by the name of "Vadorequest" on dev.to. Basically, there are three main folders under the "src" folder: "common", "modules", and "pages". The "common" folder contains all the components that are used across the codebase, such as the navbar and footer, as well as hooks, context, types, etc. The "modules" folder contains all the components and utilities that are specific to a certain feature of the website, such as the gallery. The "pages" folder contains all the pages of the website, such as the homepage and login page.
I imagine there are better ways to structure a Next.js project, but it worked well for me.
Things I would do differently
There are a a few ways the project could be improved. Firstly, some pages could have been server-side rendered to avoid exposing API endpoints. Currently, almost all images that are displayed on the website are fetched client-side so fetching them server-side would obviously stop the API endpoints being exposed. Next.js supports this out of the box, but on the other hand, server-side rendering would mean that I wouldn't be able to use the component hooks provided by the Apollo Client.
Another thing I would do differently would be to have a proper image API. There are many SaSS solutions that provides a service where you upload images which are then converted to individual endpoints. You could even make it yourself. I decided to simply reference the images hosted on Unsplash to avoid storage fees associated with hosting images on a server. There are several problems with this approach - firstly, it's not very moral of me to use their API for my own purposes, and secondly, it's very awkward for people to "upload" images because they have to reference a URL. Overall, it's not a very good solution, so hooking it up to something like Cloudinary would definitely be a huge improvement to Onsplash, even for performance.
Learnings I can use in the future
The codebase is too big to cover everything I did in this project, but hopefully the code snippets and explanations above give you an idea of what I did to complete the project. In terms of what I learned from this project, I've listed a few things below.
- I developed my skills using Typescript in a React project by defining simple types for components and the objects I was working with.
- I learnt GraphQL by creating queries using the Apollo Client, and fetched data from the API using hooks provided by the same libary.
- I recreated the Unsplash UI with TailwindCSS so I enhanced my skills using that.
- I learnt how to organize a larger project, i.e. with a solid folder structure.
After finishing the project I feel I have a much better understanding of especially Typescript and GraphQL.